April 9, 2021
We will start with a rather short introduction in kubernetes, create a namespace using the MayopeCloudConsole.
Using this namespace we will deploy a docker container and make it accessible from the internet.
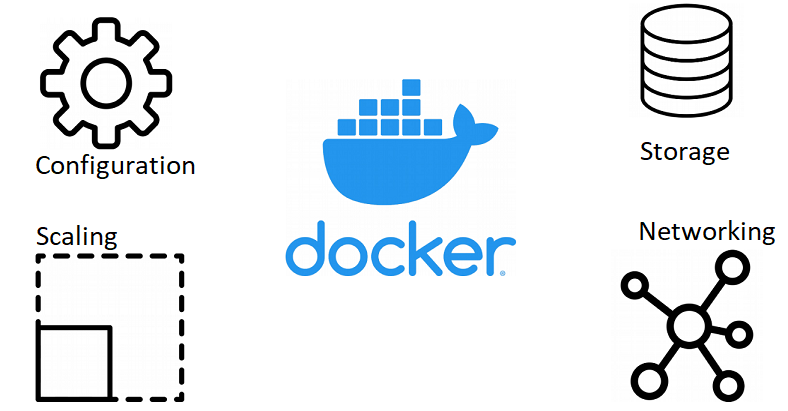
What can I do with kubernetes?
Kubernetes is a tool to orchestrate containers. It enables you to run, configure, scale and connect them against each other.
How does kubernetes archive this?
Kubernetes can be understood as a tool to connect multiple (physical or virtual) machines and enable them to share workloads.
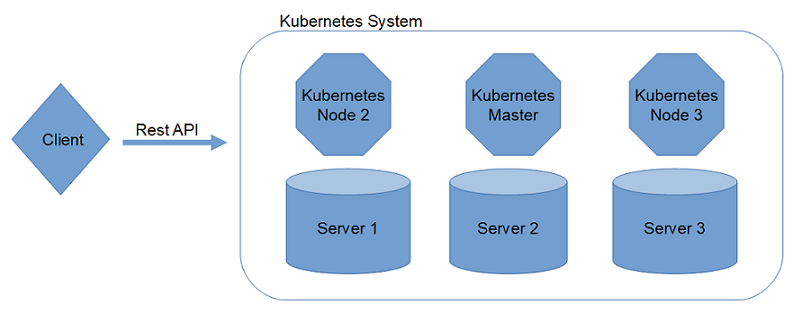
On each machine runs a kubernetes node and one node of this set is chosen to be the master node.
He coordinates the other nodes and decided which container gets to run on which node.
The Kubernetes system is controlled through a rest api. This rest api can be best addressed with the cli tool kubectl
How can I deploy stuff in Kubernetes?
Analog to a database (e.g. PostgreSQL
) where one instance can have multiple databases running,
one kubernetes cluster can have a numerous amount of different realms or zones.
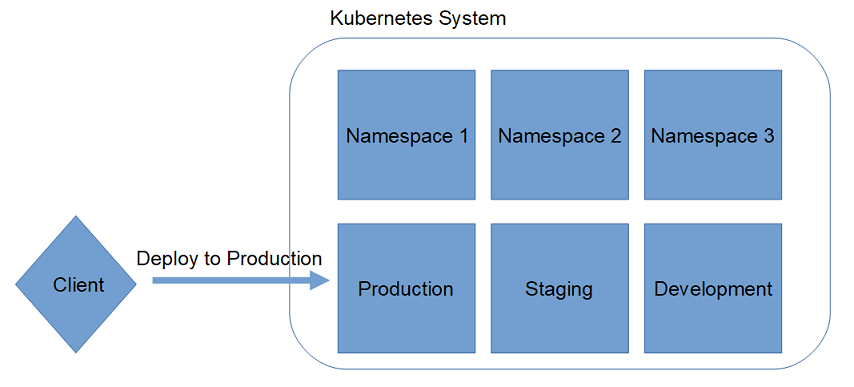
A realm is called Namespace.
Usually you use these namespaces to separate different environments like production, development or staging.
Another use case could be one namespace per client to run a separate instance for each tenant.
I want to get my own Namespace!
MayopeCloud can get you your Namespace within minutes.
The resources needed for this tutorial are contained in the free offer of MayopeCloud.
You can register here: Registration . You will get an email with the instructions on how to log in.
After registration, you can log into the MayopeCloudConsole .
In the tab Namespace you will be able to click on Request Namespace:
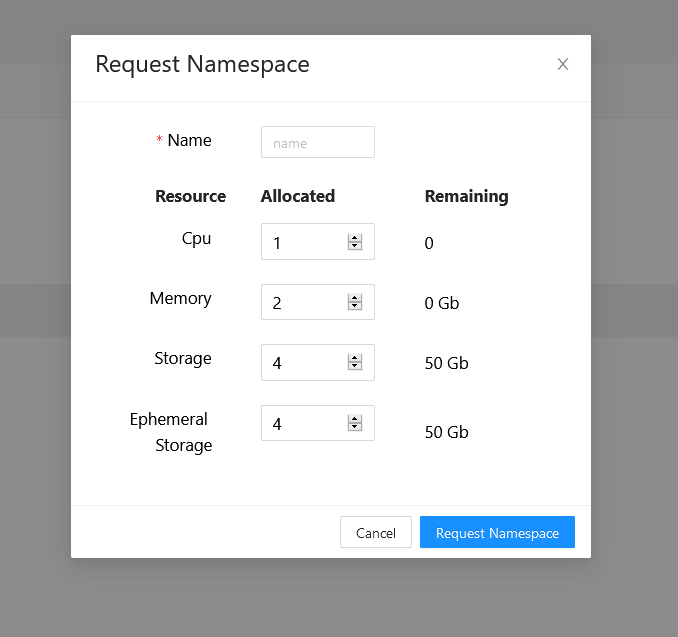
Assign a name to it and leave the resources at the default values. These are sufficient for this tutorial.
After requesting, your namespace should appear in the table.
After some minutes it should transform from Setting up Namespace to Namespace is online.
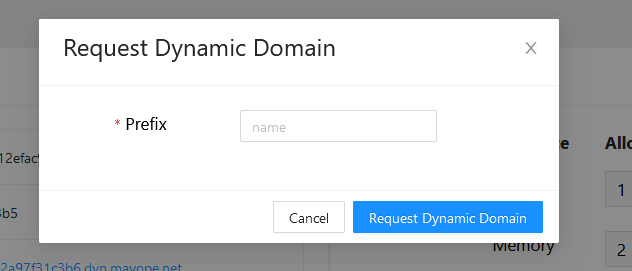
Later in the tutorial we will need a domain to reach our example service in the world wide web.
We will use a Dynamic Domain for this purpose.
You can request a dynamic domain for your namespace by clicking on the namespace id.
This opens the detail page of the namespace.
At the bottom of the page is a drawer with the name Domain.
If you open this drawer you will be able to request a dynamic domain.
 .
.
Give it a prefix and submit this dialog.
I want to access my created Namespace!
For this part of the tutorial we will need the kubectl command line client : Installation kubectl
.
With kubectl we can access our namespace.
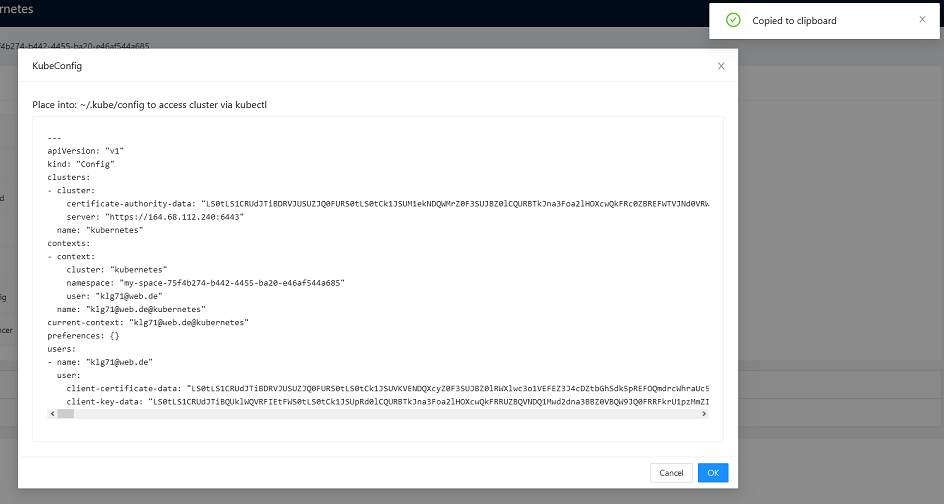
kubectl expects a file named config in the directory ~/.kube where the address for your current kubernetes instance, and your credentials are stored.
You may have to create the directory ~/.kube, if you’ve never used kubectl before.
To get the config-file we will use namespace detail view in the MayopeCloudConsole.
You will find the kubeconfig with a click on show kubeconfig right below the namespace status.
 .
.
You can copy the content of this dialog to ~/.kube/config.
Now you should be able to execute following command in your console (shell, powershell, cmd)
kubectl get pods
This should produce the following output:
No resources found in my-space-75f4b274-b442-4455-ba20-e46af544a685 namespace.
Now just deploy my docker container!
Docker container are contained within the Pod resource in kubernetes.
Pods can contain multiple containers, but we will start with just one.
All resources deployed in kubernetes are represented as yaml (or json) files.
Safe the following text in a file called: pod.yaml
apiVersion: v1
kind: Pod # Kind of resource to deploy
metadata: # general information about our resource
  name: hello-world
spec:
  containers:
    - name: hello-world
      image: nginxdemos/hello # Docker Image to deploy
      ports: # Ports exposed by this container
        - name: web
          containerPort: 80
          protocol: TCP
To create this resource in kubernetes we use the kubectl apply command:
> kubectl apply -f pod.yaml

pod/hello-world created

> kubectl get pods

NAME          READY   STATUS    RESTARTS   AGE
hello-world   1/1     Running   0          39s
This docker image runs isolated in the namespace and is only reachable within said namespace.
To nevertheless access our pod on port 80 we can use kubernetes build in PortForwarding-Feature.
> kubectl port-forward hello-world 80:80

Forwarding from 127.0.0.1:80 -> 80
Forwarding from [::1]:80 -> 80
Handling connection for 80
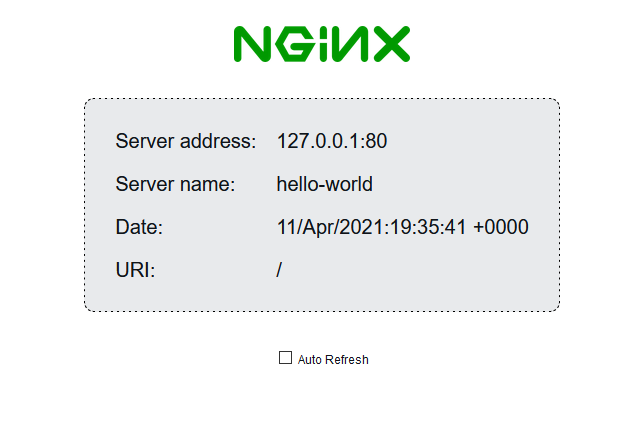
This forwards the containerport 80 to the port 80 on our localhost.
You can then access the container through: http://localhost:80.
 .
.
The port-forwarding is however rather unstable and doesn’t consistently work with other protocols than http.
The resource Pod has very limited use and no real application besides a hello-world pod.
If this pod finishes, kubernetes won’t restart it, if we delete it accidentally kubernetes will also not restart it.
If we change the image and tried to apply yaml again, it would give us an error that we cannot do that.
Instead, we had to create a new Pod, wait till it s ready and then remove the old Pod.
Fortunately there is a Kubernetes resource that handles the above use case very well.
This resource is called Deployment
How much more work do I have with this Deployment?
The definition of a deployment is luckily really easy.
It looks basically the same way a Pod looks it just has one more nesting statement:
deployment.yaml
apiVersion: apps/v1
kind: Deployment
metadata:
  name: hello-world
spec:
  selector: # These labels have to match those configure under template.metadata.labels
    matchLabels:
      app: hello-world
  template:
    metadata:
      labels: # These are the labels assigned to the pod so it can be identified
        app: hello-world
    spec:
      containers:
        - name: hello-world
          image: nginxdemos/hello
          ports:
            - name: web
              containerPort: 80
              protocol: TCP
Before we apply this Deployment we first have to delete our previous Pod resource:
> kubectl delete pod hello-world

pod "hello-world" deleted
Then we can apply our deployment:
deployment.apps/hello-world created

> kubectl get pods

hello-world-8d765f896-8gdp5   1/1     Running   0          67s
If we kill this pod with kubectl delete pod hello-world-8d765f896-8gdp5 it will be automatically recreated:
> kubectl delete pod hello-world-8d765f896-8gdp5

pod "hello-world-8d765f896-8gdp5" deleted

> kubectl get pods

hello-world-8d765f896-9c67v   0/1     ContainerCreating   0          3s
The new container has a new name and its still in ContainerCreating phase.
A deployment will do its best to always have at least 1 (per default, can be set through spec.replicas setting) pod up.
If you change the docker image of this deployment it will automatically spin up a new container,
wait till its healthy and only then delete the old pod.
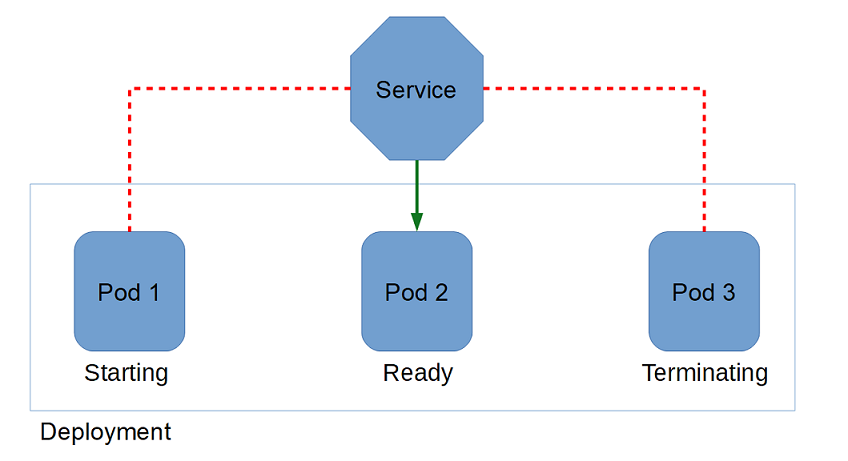
With automatically starting and stopping containers how can we connect to the right one?
This problems handles another Kubernetes resource really well.
This resource is logically named Service
 .
.
When you define a service you give it a set of labels it will match on all pods.
Any incoming traffic is then balanced per round-robin
on all pods matching this label that are in Ready state.
You can create a service like this:
service.yaml
apiVersion: v1
kind: Service
metadata:
  name: hello-world # This is also the dns name where this service is reachable within the same namespace
spec:
  ports:
    - name: http # This port in this service is named 'http'
      port: 80 # It exposes itself on port 80
      protocol: TCP # It uses the TCP protocol
      targetPort: 80 # It will target the port 80 in the matching container
  selector: # All containers matching this label will be considered for traffic
    app: hello-world
  # There are several types of services ClusterIP assigns the service an ip in the cluster
  # ClusterIP services are only exposed within the cluster which is enough for this use case
  type: ClusterIP
> kubectl apply -f service.yaml

service/hello-world created
We can then use this service for port-forwarding instead of searching for the right pod
> kubectl port-forward svc/hello-world 80:80

Forwarding from 127.0.0.1:80 -> 80
Forwarding from [::1]:80 -> 80
Handling connection for 80
What is needed todo that I can access my container from the internet?
Kubernetes has another resource for that (at least for http).
Its called Ingress and its basically an entry in the kubernetes-wide internet-facing load-balancer.
You can imagine a single NGINX
with one entry for each defined Ingress
 .
.
For our container to be reachable we will need a domain.
Luckily we already requested one right after creating a Namespace in the MayopeCloudConsole.
 .
.
You can see the domain hello-world-1e7bdecd-8f67-4329-bc49-08784410c2de.dyn.mayope.net is created in this example
We will need this domain for the following definition:
ingress.yaml
apiVersion: networking.k8s.io/v1
kind: Ingress
metadata:
  name: hello-world
spec:
  rules:
    - host: hello-world-1e7bdecd-8f67-4329-bc49-08784410c2de.dyn.mayope.net
      http:
        paths:
          - path: /
            backend:
              service:
                  name: "hello-world"
                  port:
                    number: 80
> kubectl apply -f ingress.yaml
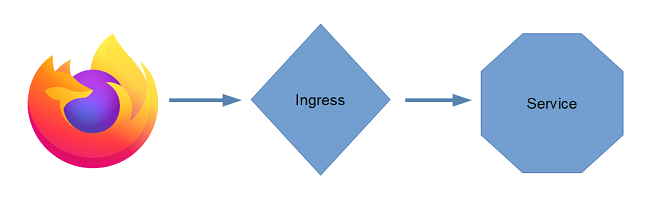
You can now access your service in your favorite internet browser through the created dynamic domain.
In my example: https://hello-world-1e7bdecd-8f67-4329-bc49-08784410c2de.dyn.mayope.net
The Mayope Cloud is configured to automatically assign all external http services a certificate and expose them as https services.
You can disable this mechanic as describe in the docs
So this is all it takes to deploy containers?
We learned about the basics of Kubernetes and used this to deploy our container in a Namespace.
Secondly we made this container fault-resistant(through the simple mechanic to restart it when it faults).
At last, we made this container accessible from the world wide web.
All used files are accessible through this: gist